


Psp 10 (Any version will work)
Tube of Choice - I used "Angel" by Jose A Cano,
You have to have a License to use his work and you can purchase it Here.
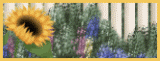
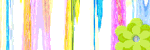
Scrap Kit used is "Blueberry" is by Lynn at Scrappers Emporium. It is a FTU Kit.
Thanks Lynn for the Beautiful Kit.
Template "MC Template 80" by Melissaz Creationz.
~Lets get Started~
Open your Template MC_Template 80
Go to Window - Duplicate - And close out the original.
Image - Canvas size, and change it to 650 X 650.
Add a New Layer - then Drag it to the bottom.
Making sure you are on the New layer, then FF it White.
Copy and Paste as a New Layer Paper 5
Layers - Load / Save Mask -Load Mask
EBDmask76 by Rachel08 with these Settings -
Source Luminace - Fit to Canvas - Hide all Mask - Ticked.
And Invert Transparency - Checked
Layers - Delete, Merge - Merge Group.
Highlight your Dark Circle Layer - Selections/Select All
Selections/ Float - Selections/Defloat.
Copy and Paste Paper 4 as a New Layer.
Selections/Invert - and Hit Delete on your Keyboard.
Selections - Select None
Drop Shadow of Choice then
Delete your dark Circle Layer.
Highlight your Light Circle Layer
Selections/Select All - Selections/ Float - Selections/Defloat
Copy and Paste Paper 2 as a New Layer.
Selections/Invert - and Hit Delete, Drop Shadow of Choice,
then Delete your Light Circle Layer.
Highlight your Rectangle Layer
Selections/Select All - Selections/ Float - Selections/Defloat.
Layer - New Raster Layer
and Flood Fill with #e5c0d3. Drop Shadow of Choice.
Delete your Rectangle Layer.
Highlight your Rectangle Frame Layer - Selections/Select All -
Flood Fill with same Color as Last Step
Effects/Inner Bevel using thses Settings Below:
Bevel - #2, Width - 8, Smoothness - 40, Depth - 2
Ambience - 34, Shininess - 10, Angel - 315, Intensity - 50, & Elevation - 20.
Selections/Select none - Drop Shadow of Choice.
Highlight your Squares Layer - Selections/Select all .
Layer - New raster Layer, and FF with #bb99b7
Selections/Select None - Drop Shadow of Choice.
Delete the Squares layer.
On your FF Squares Layer
Grab your Magic wand Click on the First Square,
Now Copy and Paste your Tube as a New Layer
Position a part of it in the Square.
When done, go to Selections/Invert - Hit Delete on your Keyboard.
Repeat the same steps as above except click on the Last square layer.
When done - Selections/Select None.
Highlight the Square Frames Layer.
Selections/Select All - Selections/Float/Defloat.
Flood Fill with #614c6b.
Selections/Select None.
Drop Shadow of Choice.
Hightlight your Swirls Layer.
Selections/Select All - Selections/Float/Defloat.
Flood Fill with #614c6b.
Selections/Select None.
Drop Shadow of Choice.
Now copy and Paste your Tube & any Embellishments you want.
Drop Shadow of choice on them .
Add your Copyright/License Info.
Name it and Save it .
That's it your All Done!!
I hope you liked my Tutorial !
*Hugz* Carolyn
This Tutorial was written on 6thth August 2009
Please feel free to LINK to the tutorial
and/or print it out for your personal use. © Carolyn 2009


0 comments:
Post a Comment